
Simple Particle Physics
As I mentioned last time, I’m going to move on from fiddling with my Terrain class for a little while, and start working on some physics code instead. I bought a copy of Ian Millington’s Game Physics Engine Development some months ago and skimmed through it, but was too busy with other things to really get into the accompanying source code. Now, I do have some free cycles, so I’m planning on working through the examples from the book as my next set of posts.
Once again, the original source code is in C++, rather than C# as I’ll be using. Millington’s code also uses OpenGL and GLUT, rather than DirectX. Consequently, these aren’t going to be such straight ports like I did with most of Frank Luna’s examples; I’ll be porting the core physics code, and then for the examples, I’m just going to have to make something up that showcases the same features.
In any case, we’ll start off with the simple particle physics of Chapters 3 & 4, and build a demo that simulates the ballistics of firing some different types of projectiles. You can find my source for this example on my GitHub page, at https://github.com/ericrrichards/dx11.git.
Particles
Particles are the simplest objects that we can physically model; just a position and a mass, with no size, rotations or other structural details impacting their movement. Technically, point-mass particles like the one we’ll implement here don’t exist, but they are a useful abstraction. Because a particle is so simple, we don’t need to rely on anything much more complicated than basic high-school physics to model particles, at least now while we are ignoring collisions. Our particle class looks like this:
public class Particle {

    public Vector3 Position { get; set; }
    public Vector3 Velocity { get; private set; }
    public Vector3 Acceleration { get; private set; }

    // fake tweakable "drag" force
    public float Damping { get; set; }

    // using inverse-mass rather than mass avoids 0-mass particles, and allows infinite mass objects
    public float InverseMass { get; set; }
    public float Mass {
        get {
            if (InverseMass <= 0) {
                return float.MaxValue;
            }
            return 1.0f / InverseMass;
        }
        set {
            Debug.Assert(value > 0);
            InverseMass = 1.0f / value;
        }
    }
    public bool HasFiniteMass { get { return InverseMass >= 0; } }

    // store forces applied during a frame
    protected Vector3 ForceAccum;


    public Particle(Vector3 position, Vector3 initVelocity, Vector3 initAcceleration, float mass) {
        Position = position;
        Velocity = initVelocity;
        Acceleration = initAcceleration;
        Mass = mass;
    }
}
Position and Velocity are straightforward and exactly what you would expect. I did make the setter private for Velocity, since we won’t ever be modifying its value directly. Instead we’ll apply forces to the particle, and have our physics integrator function update the velocity according to the acceleration calculated from those forces.
Acceleration, here, is not the current acceleration of the particle. It is actually a constant initial acceleration. Mostly, we will be using this property to simulate gravity, but we can also use it for any other constant acceleration, for instance the acceleration of a helium balloon because it is less dense than the air around it.
Damping, is something of a hack, to be honest. As Mr. Millington explains it, it operates both as a sort of quick and dirty approximation of atmospheric drag forces, and helps guard against numerical precision issues in the integration calculation that might result in incorrectly accelerating an object.
Rather than storing the mass of the particle, we will actually store the inverse mass, or 1/mass. This allows us to easily avoid zero-mass particles, which are a physical impossibility, and would also raise havoc with our integrator function. This also allows us to easily represent infinite mass objects, which are likewise physically impossible, but are another useful abstraction. Infinite mass makes sense in the context of a game for things like the walls and floors of a level, immovable obstacles, and such.
Lastly, we have ForceAccum, which is used to accumulate forces applied to the particle each frame. In this example, we’re not using any external forces.
The Integrator
Our integrator function is called once per frame to update the particle. The name integrator come from the fact that we are calculating some integrals here, however, don’t be scared: this is calculus, but its pretty easy and makes a lot more sense than anything they ever tried to get you to do in high school.
public void Integrate(float dt) {
    Debug.Assert(dt > 0);

    // ignore immovable, infinitely massive objects
    if (InverseMass <= 0.0f) {
        return;
    }
    // update position
    Position += Velocity * dt;

    // calculate the acceleration
    var resultingAcc = Acceleration;
    resultingAcc += ForceAccum * InverseMass;

    // update velocity
    Velocity += resultingAcc * dt;
    // apply damping, accounting for frame-time
    Velocity *= MathF.Pow(Damping, dt);

    ClearAccumulator();
}
If you remember your basic physics, you’ll see that we are updating the position using the
formula that assumes that no acceleration is occurring, that is,
![]() rather than the more complete
rather than the more complete
![]() . The reason for this is that we will be calling the Integrate
function from somewhere within the update portion of our game loop, using the current frame time as
dt. Since we will ideally be running at 30 FPS or better, this makes the timestep just a
fraction of a second, so squaring it and then taking half of that leaves us with an insignificant
factor to scale the acceleration by. Unless we have very high accelerations, this result of
this extra calculation will be unnoticeable.
. The reason for this is that we will be calling the Integrate
function from somewhere within the update portion of our game loop, using the current frame time as
dt. Since we will ideally be running at 30 FPS or better, this makes the timestep just a
fraction of a second, so squaring it and then taking half of that leaves us with an insignificant
factor to scale the acceleration by. Unless we have very high accelerations, this result of
this extra calculation will be unnoticeable.
We calculate the current acceleration by using a rearranged form of the force equation from
Newton’s Second Law. Normally, one sees it written like so:
![]() , so that the force is the product of the mass and acceleration.
Since we want to find the acceleration, we can use a little algebra and rearrange it into the form:
, so that the force is the product of the mass and acceleration.
Since we want to find the acceleration, we can use a little algebra and rearrange it into the form:
![]() . At this point, you should be able to better understand why we
are storing inverse mass rather than mass for the particle, as a zero mass would cause our code to
throw a divide by zero exception here. Similarly, an infinite mass object will ignore any
forces acting upon it.
. At this point, you should be able to better understand why we
are storing inverse mass rather than mass for the particle, as a zero mass would cause our code to
throw a divide by zero exception here. Similarly, an infinite mass object will ignore any
forces acting upon it.
Next, we update the particle’s velocity using the calculated acceleration, and then apply damping. As calculated here, the damping value represents the percentage of the particle’s velocity that it will retain per second. As a rule of thumb, values close to 1.0 mean no or insignificant drag, while smaller values increase the amount of apparent drag. The damping value should always be less than 1.0f, even for objects that should experience no drag, since floating point precision issues can result in small incorrect accelerations. And damping values outside the [0.0,1.0] range will result in bizarre, runaway accelerations.
The last step is to zero out the force accumulator, to prepare the particle for the next frame.
The Example: Shooting Projectiles
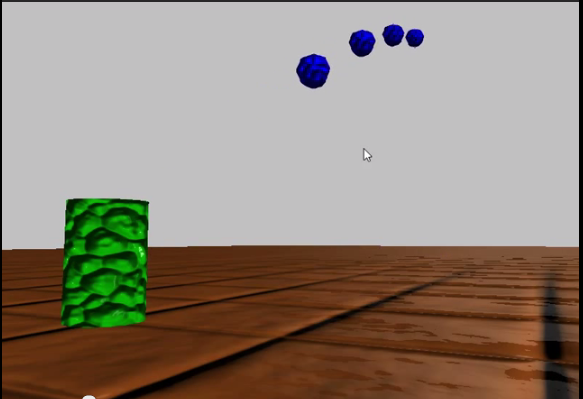
In the example that you can see in the video above, we have four types of projectiles that can be fired by the toxic trashcan, each with different physical characteristics. We have:
- A pistol-type round. This round has a medium, straight-line initial velocity, and a small negative initial acceleration, so that it has a slight “drop” at distance.
- An artillery shell. This round has a medium velocity, at about a 35 degree angle from the ground, with a larger initial negative acceleration, so that it travels in a classic ballistic arc.
- A fireball. This round has a low velocity, with a small positive acceleration, which causes it to curve upward down-range.
- A laser bolt. High velocity, no acceleration due to gravity, Zap!
In the demo, you can switch between the different rounds using the number keys, and fire using the spacebar.
AmmoRound Structure
To represent each bullet we shoot, we’ll create a simple structure. This will be just an enum to indicate the type of the shot, a Particle to hold physics information, a counter to track how long the shot has been alive, and a ModelInstance to let us render the shot easily.
public enum ShotType {
    Pistol,
    Artillery,
    Fireball,
    Laser
};

internal struct AmmoRound {
    public Particle Particle { get; set; }
    public ShotType ShotType { get; set; }
    public float StartTime { get; set; }
    public BasicModelInstance Model { get; set; }

    public void Render(DeviceContext dc, EffectPass pass, Matrix view, Matrix proj) {
        var position = Particle.Position;
        Model.World = Matrix.Scaling(new Vector3(1 + Particle.Mass/100)) * Matrix.Translation(position);

        Model.Draw(dc, pass, view, proj);

    }

};
I’m going to gloss over the setup and initialization code, as there is nothing novel that I haven’t covered previously, as well as the rendering. Our UpdateScene function, will be worth looking at, as it is here that we will need to integrate all of the live bullets in the air, as well as handle creating a new bullet when the user hits the space bar.
public override void UpdateScene(float dt){
    // camera updates, etc

    for (var index = 0; index < _ammo.Count; index++) {
        var shot = _ammo[index];
        shot.Particle.Integrate(dt);
        if (shot.Particle.Position.Y < 0.0f || shot.StartTime + 10.0f < Timer.TotalTime || shot.Particle.Position.Z > 200.0f) {
            _ammo.Remove(shot);
        }
    }
    _fireDelay -= dt;
    if (Util.IsKeyDown(Keys.D1)) {
        _currentShotType = ShotType.Pistol;
    } else if (Util.IsKeyDown(Keys.D2)) {
        _currentShotType = ShotType.Artillery;
    } else if (Util.IsKeyDown(Keys.D3)) {
        _currentShotType = ShotType.Fireball;
    } else if (Util.IsKeyDown(Keys.D4)) {
        _currentShotType = ShotType.Laser;
    } else if (Util.IsKeyDown(Keys.Space) && _fireDelay < 0) {
        Fire();
        _fireDelay = 0.2f;
    }
}
To update the rounds, we loop through the list of active rounds that we are maintaining. We call the Integrate() function of each round’s Particle to update its postion. Then we check that the particle has collided with the ground plane, is too far away or too old, and kill it if any of those conditions match. Note that we cannot use a foreach loop here, as we are potentially modifying the list, and the iterators behind the foreach get angry and blow up in your face if you pull elements out from underneath them.
Our Fire() function handles the creation of a bullet. Picking the appropriate physics
parameters is a little tricky. The muzzle velocities of real firearms are much higher than we
can really represent in a game; most rifles and artillery pieces fire rounds at supersonic speeds,
so a direct hit would kill you before you heard the report, much less saw anything.
That’s not really any fun and doesn’t feel right in a game, so the muzzle velocities
are usually dialed way down. However, this means that we need to increase the mass of the
bullet, so that the energy of our modeled bullet stays the same. The relationship between
energy, mass and velocity is
![]() , so reducing the velocity by half means that we need to quadruple the
mass to maintain the same energy. Similarly, because the bullet is now moving more slowly,
gravity has more time to act upon it, so to maintain natural-looking ballistic curves, we have to
also scale down the normal acceleration due to gravity by the ratio of the real velocity to the
simulated velocity.
, so reducing the velocity by half means that we need to quadruple the
mass to maintain the same energy. Similarly, because the bullet is now moving more slowly,
gravity has more time to act upon it, so to maintain natural-looking ballistic curves, we have to
also scale down the normal acceleration due to gravity by the ratio of the real velocity to the
simulated velocity.
private void Fire() {
    if (_ammo.Count >= MaxRounds)
        return;
    var shot = new AmmoRound { Model = _sphere };
    var firingPoint = new Vector3(0, 1.5f, 0.0f);
    switch (_currentShotType) {
        case ShotType.Pistol:
            shot.Particle = new Particle(firingPoint,
                new Vector3(0, 0, 35), // 35 m/s
                new Vector3(0, -1, 0), // small amount of gravity
                2.0f // 2 kg
                ) { Damping = 0.99f };
            break;
        case ShotType.Artillery:
            shot.Particle = new Particle(
                firingPoint,
                new Vector3(0, 30, 40), // 50 m/s
                new Vector3(0, -20, 0), // large amount of gravity
                200.0f // 200 kg
                ) { Damping = 0.99f };
            break;
        case ShotType.Fireball:
            shot.Particle = new Particle(
                firingPoint,
                new Vector3(0, 0, 10), // 10 m/s
                new Vector3(0, 0.6f, 0), // float up slightly
                1.0f // 1 kg
                ) { Damping = 0.9f };
            break;
        case ShotType.Laser:
            shot.Particle = new Particle(
                firingPoint,
                new Vector3(0, 0, 100), // 100 m/s
                new Vector3(0, 0, 0),  // no gravity
                0.1f // 100 grams
                ) { Damping = 0.99f };
            break;
    }

    shot.Particle.Position = firingPoint;
    shot.StartTime = Timer.TotalTime;
    shot.ShotType = _currentShotType;

    shot.Particle.ClearAccumulator();

    _ammo.Add(shot);
}
Next Time…
I’m going to continue working through the particle physics section. The fireworks example from the book looks like it might be fun to implement under my framework, and would probably make a pretty snazzy video, so that’s where I’m headed next.